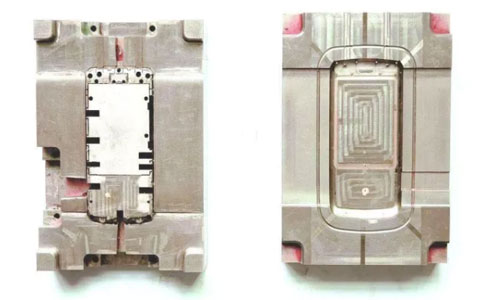
The assembly and adjustment of the die in the die-cutting machine are particularly important. The correct positioning of the die assembly, also known as "die mounting," directly affects the production efficiency and product quality of die-cutting, and may even cause safety accidents, ranging from damage to machine parts to personal injury. Therefore, all die adjustment work is extremely important!
Step 1: Receiving the die for die-cutting processing
After gathering all the necessary materials, the die for die-cutting needs to be received according to the blueprint and part number. It is important to accurately match the part number and tool number during the process of receiving the die. It is not enough to rely solely on the appearance of the product for selection. In large-scale die-cutting factories, there are many similar-looking tools for products, and different sets of tools may be used for the same product. If the wrong tool is chosen, it will result in significant waste of resources when production is stopped.
Step 2: Securing the die for die-cutting
After receiving the die, it needs to be securely fixed on the template of the die-cutting machine. During this process, it is necessary to carefully follow the instructions and determine whether it is a top cutting or bottom cutting die. If it is a top cutting die, it needs to be fixed on the bottom template, while if it is a bottom cutting die, it needs to be fixed on the top template. The usual method of fixation is using a thin, high-quality double-sided adhesive. It is crucial to choose a double-sided adhesive with high stickiness and stability (such as 3M tape) to prevent the die from falling off during the cutting process.
Step 3: Adjusting the angle of the die
When fixing the die, it is not only about securing the tool, but also ensuring the perpendicularity between the die and the material feed direction. This is important to ensure that the die remains perpendicular to the material strip during the cutting process.
Step 4: Fixing the die-cutting pad
After fixing the die, the die-cutting pad needs to be secured. The main function of the pad is to protect the cutting edge and prolong the tool's service life by reducing damage. A PVC board or PE insulation board with a thickness of about 1mm is commonly used as the die-cutting pad. The size of the pad should be larger than the four sides of the tool's base plate by at least 5mm. It is recommended to fix the pad on one side of the template in the direction of material feed.
Some die-cutting professionals have the habit of using two pads for convenience during machine startup, as a means of adjustment.
Step 5: Adjusting the die-cutting pressure
The adjustment of pressure mainly refers to adjusting the depth of the die-cutting seat. After installing the tool, a trial press is needed to check if the die can effectively cut the material. It is strictly prohibited to directly engage in single or linked cutting during the pressure adjustment process. The equipment should be adjusted to manual mode for testing and adjustment. If the die-cutting material is still not effectively cut after adjusting the seat to the maximum stroke, another round of pressure adjustment should be performed. If the seat reaches the maximum stroke and the die has already cut into the lower seat, it indicates that the seat pressure is too deep and the pressure should be reduced for further testing. Note: When adjusting, it is advisable to use the smallest stroke as the unit for pressure increase or decrease, without excessive adjustments.

Step 6: Fine-tuning the die flatness
When the tool pressure is adjusted to fully cut the product, but there are still some minor areas that do not meet the cutting requirements, fine-tuning of the die flatness is needed. Usually during the fine-tuning process, carbon paper is used. It is placed between the pad and the template, and then the material is cut to leave marks on the pad. The cut patterns are compared with the marks on the template, and if the cutting is too deep in certain areas, a small blade is used to scrape the template to the correct depth. If the cutting is too shallow and ineffective, a tape or other material can be used to elevate the template in those areas to ensure effective cutting. During the flatness fine-tuning process, it is important to make adjustments in the smallest unit for both scraping and elevation. OPP tape with a thickness of 0.025mm is commonly used as the material for elevation, but other thin materials can also be used.
Step 7: Adjusting the die angle
After completing the above steps, continuous production can begin. However, during the continuous cutting process, it may be observed that the products are not completely perpendicular to the material feed direction, especially during multiple-cutting. This is because the die was not adjusted to be perfectly or strictly perpendicular to the material feed direction. In such cases, an adjustment of the die angle is required. Currently, most machines in the market have the ability to adjust the die angle without redefining the die mounting. It only requires minor adjustments to the die seat on the equipment.
Contact: Pamela
Phone: +86 189 6365 3253
E-mail: info@industryprocess.com
Whatsapp:+86 189 6365 3253
Add: Yajing Industrial Park, No. 59 Shuangjing Street, Weiting Town, Suzhou Industrial Park
We chat
